
A heat press is one of the most important machines in the DTF printing process. Even if your printer produces excellent colors and fine details, the final result still depends on accurate heat, pressure, and pressing time.
Choosing the right heat press for DTF printing helps you produce durable, smooth, and vibrant transfers on T-shirts, hoodies, bags, uniforms, and many other textile products. This guide explains how a DTF heat press works, which type to choose, and how to achieve better transfer results.
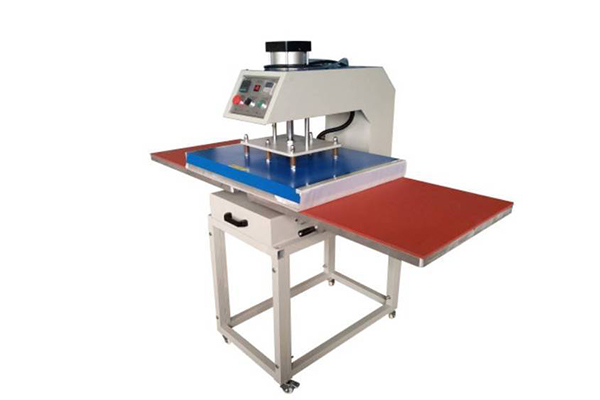
What is a Heat Press for DTF Printing?
A heat press is a machine that uses controlled heat and pressure to transfer a printed DTF design from PET film onto fabric.
The basic DTF printing process includes:
- Printing the design onto DTF film
- Applying hot-melt adhesive powder
- Curing the powder
- Positioning the film on the garment
- Pressing it with a heat press
- Removing the film
- Performing a final press
Unlike a household iron, a heat press provides consistent temperature and even pressure across the entire design. This reduces the risk of loose edges, uneven adhesion, and premature cracking.
Why Do You Need a Heat Press for DTF Printing?
DTF adhesive must reach the correct temperature to bond properly with the fabric. If the heat is too low, the design may peel after washing. If it is too high, the colors, film, adhesive, or garment may be damaged.
A suitable DTF heat press provides:
- Stable and adjustable temperature
- Consistent pressure across the platen
- Accurate pressing time
- Even heat distribution
- Repeatable results for batch production
For commercial DTF printing, consistency is especially important. Customers expect every garment in an order to have the same appearance and durability.
What Types of Heat Presses Are Suitable for DTF?
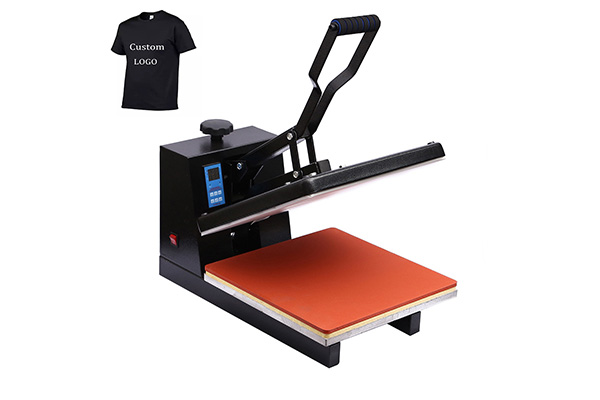
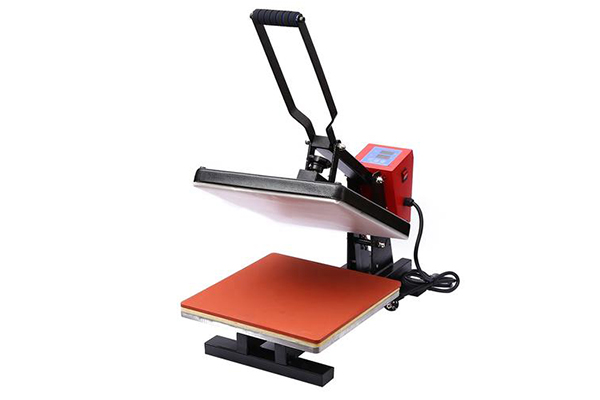
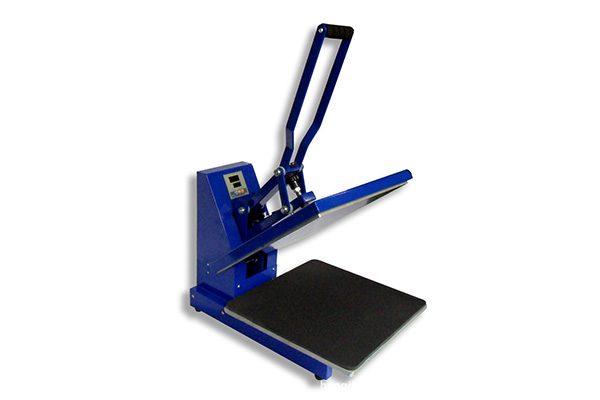
1. Clamshell Heat Press
A clamshell machine opens and closes like a clamshell. The upper heating platen lifts upward at an angle.
This compact design is suitable for small workshops, home businesses, and beginners. It is generally easy to operate and requires less working space. However, thick garments can sometimes be more difficult to position evenly.
2. Swing-Away Heat Press
The upper platen of a swing-away heat press moves sideways instead of lifting at an angle. This gives you better access to the lower platen.
It is useful when you need precise transfer placement or frequently print on thicker products. The main limitation is that it requires more space around the machine.
3. Drawer Heat Press
A drawer-style heat press has a lower platen that slides out. This allows the operator to arrange the garment and transfer away from the heating area.
It can improve safety and make garment positioning easier. Drawer presses are often a good choice for busy printing shops.
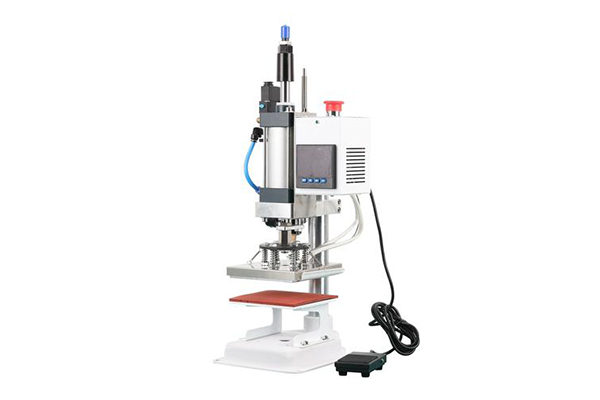
4. Pneumatic Heat Press
A pneumatic heat press uses compressed air to apply pressure automatically. It reduces manual work and provides more consistent pressure during repeated production.
This type is suitable for high-volume DTF printing, but it usually costs more and requires an air compressor.
5. Automatic Dual-Station Heat Press
A dual-station heat press allows the operator to prepare one garment while another is being pressed. It can significantly improve production efficiency.
This machine is commonly used by professional printing businesses handling medium or large orders.
How to Choose the Best Heat Press for DTF Printing
Select the Right Platen Size
Your heat press should be large enough for the designs you normally produce. Common sizes include:
- 9 × 12 inches for small designs and portable use
- 12 × 15 inches for small garment businesses
- 15 × 15 inches for standard T-shirt printing
- 16 × 20 inches for larger prints and commercial production
A 15 × 15-inch or 16 × 20-inch heat press is usually more versatile for regular DTF T-shirt printing.
Check Temperature Accuracy
Accurate temperature control is essential because the displayed temperature may not always match the actual platen temperature. Poor temperature consistency can cause some parts of a design to adhere while others remain loose.
Look for a machine with a reliable digital controller and even heating elements. You can also use an infrared thermometer or temperature strips to check different areas of the platen.
Consider Pressure Adjustment
Different fabrics and transfer films may require slightly different pressure levels. A good heat press should allow you to adjust the pressure easily.
Pressure must also be distributed evenly. If one side of the platen applies more pressure than the other, the transfer may look inconsistent.
Evaluate Production Volume
A basic manual press may be enough if you only make a few shirts each day. For larger orders, an automatic or pneumatic model can reduce operator fatigue and shorten production time.
Choose a machine based on your actual order volume rather than simply buying the largest model available.
Look for Safety Features
Useful safety features include:
- Automatic opening
- Emergency stop button
- Overheat protection
- Heat-resistant handles
- Stable machine construction
These features are particularly important when the heat press is used continuously.
Recommended DTF Heat Press Settings
There is no single setting that works for every DTF film, adhesive powder, fabric, and machine. You should always follow the recommendations provided by your transfer-film or consumables supplier.
A common starting range is:
| Setting | Typical Range |
|---|---|
| Temperature | 140–165°C |
| Pressing time | 10–20 seconds |
| Pressure | Medium to firm |
| Final press | 5–10 seconds |
Cotton, polyester, blended fabrics, and specialty textiles may require different settings. Before starting a large order, test one garment and wash it to confirm the transfer quality.
How to Use a Heat Press for DTF Transfers
1. Prepare the Garment
Place the garment flat on the lower platen. Remove wrinkles, lint, moisture, and anything else that could affect the transfer.
2. Pre-Press the Fabric
Pre-press the garment for a few seconds. This helps remove moisture and wrinkles while creating a smooth surface for the design.
3. Position the DTF Transfer
Place the printed film on the garment with the design facing the fabric. Make sure it is straight and correctly positioned.
Heat-resistant tape can help hold smaller transfers in place when necessary.
4. Apply Heat and Pressure
Close the heat press and use the settings recommended for your DTF film and powder. Avoid changing several settings at the same time when testing, as this makes it difficult to identify the cause of a problem.
5. Peel the Film
Some DTF films are hot-peel, warm-peel, or cold-peel. Remove the film according to the supplier’s instructions.
Peeling too early or too late can affect the surface and adhesion of the transfer.
6. Complete the Final Press
Cover the transferred design with parchment paper, kraft paper, or a finishing sheet, and press it again for several seconds.
The final press can improve adhesion, reduce excess shine, and give the design a more finished appearance.
Common DTF Heat Press Problems
The Transfer Peels Off
Possible causes include:
- Insufficient temperature
- Pressing time is too short
- Pressure is too light
- Adhesive powder is not fully cured
- The film was peeled incorrectly
- The garment contains moisture or surface contamination
Check each factor separately before increasing the temperature significantly.
Colors Look Dull
Dull colors may result from excessive heat, an incorrect curing process, poor-quality consumables, or insufficient pressure. Compare the actual platen temperature with the displayed setting.
The Design Has Uneven Edges
Uneven adhesion often indicates inconsistent pressure or cold spots on the heating platen. Check whether the garment’s seams, zippers, buttons, or collars are preventing the platen from closing evenly.
A pressing pillow may help level the printing area.
Press Marks Appear on the Garment
Too much heat or pressure can leave visible platen marks, especially on polyester and delicate fabrics. Lower the settings gradually, use a protective sheet, or place a pressing pillow inside the garment.
The Transfer Feels Too Thick
A thick or stiff result can be caused by excessive adhesive powder, incorrect curing, or an overly heavy final press. Improving the powder application can produce a softer finish.
Can One Heat Press Be Used for Other Printing Methods?
Yes. Many heat presses can also be used for:
- Heat transfer vinyl
- Sublimation printing
- Screen-printing transfers
- Plastisol transfers
- Reflective transfers
- Embroidered patches
However, each material requires its own temperature, time, and pressure settings. Always clean the platen and protect the garment when switching between applications.
How to Maintain a DTF Heat Press
Regular maintenance helps the machine maintain stable performance.
- Clean adhesive or ink residue from the platen
- Inspect the silicone pad for damage
- Check whether pressure remains even
- Test platen temperature regularly
- Tighten loose components when necessary
- Keep the machine in a clean, dry working area
- Follow the manufacturer’s electrical and maintenance instructions
Never clean the platen while it is hot unless the machine manufacturer specifically recommends a safe method.
Frequently Asked Questions
A 15 × 15-inch press is suitable for many standard T-shirt designs. A 16 × 20-inch model offers more space for larger graphics and commercial orders.
A household iron is not recommended for professional results because it cannot provide consistent temperature and pressure over the entire design.
A short second press is generally recommended. It helps improve adhesion and can create a smoother, more durable finish.
Yes. DTF printing works on cotton, polyester, blends, and many other materials. However, polyester may require lower heat to prevent scorching, discoloration, or dye migration.
A properly applied DTF print usually lasts 50–100 washes, or about 2–5 years, with proper care.
Conclusion
Now you understand why the heat press is so important for DTF printing. The right machine should provide accurate temperature, even pressure, and enough working space for your typical designs. Before beginning bulk production, test your transfer settings on the actual fabric. A few careful tests can help you prevent peeling, uneven colors, and damaged garments while delivering more reliable results.